Fluffy Homemade Milk Bread Rolls

Have you ever dreamt of filling your home with the warm, comforting aroma of freshly baked bread but felt intimidated by complicated, time-consuming recipes? If so, you’ve come to the right place. This recipe is your gateway to baking success, delivering incredibly soft, pillowy rolls with a tender crumb and a subtly sweet, milky flavor. In just about an hour, you can transform a few simple pantry staples into a batch of beautiful, golden buns. The process is straightforward baking at its best, making it absolutely perfect for beginners. While these rolls are delightful on their own, still warm from the oven, they truly shine as the perfect vehicle for homemade hot dogs, sliders, or delicious mini sandwiches. Get ready to impress yourself and anyone lucky enough to share them with you!
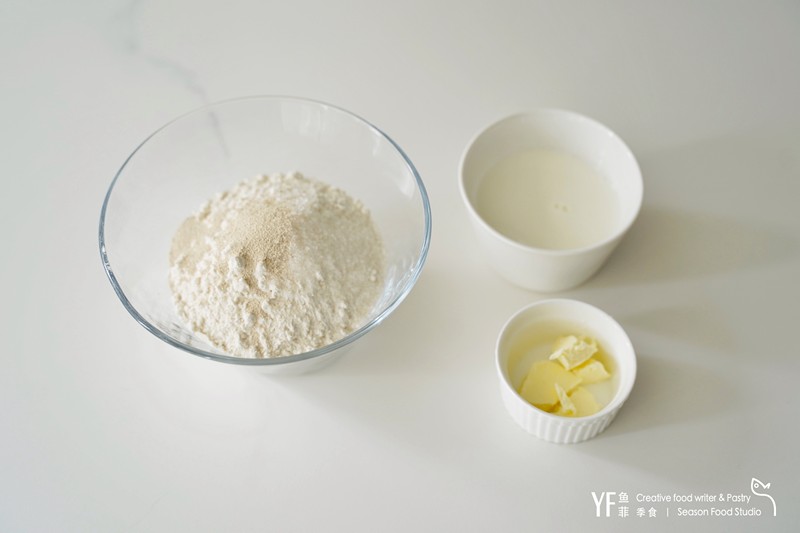
Before you begin, let’s gather your ingredients. The magic of these rolls lies in their simplicity, so you won’t need anything too exotic. For this recipe, you will need:
- Bread Flour: 200g (about 1 2/3 cups)
- Milk: 135-140g (about 1/2 cup + 1 tablespoon)
- Granulated Sugar: 12g (about 1 tablespoon)
- Salt: 3g (about 1/2 teaspoon)
- Instant Yeast: 2g (about 1/2 teaspoon)
- Unsalted Butter: 16g (about 1 tablespoon), softened to room temperature
A quick note on your ingredients: Bread flour is listed here as “high-gluten flour” in the original recipe because its higher protein content gives the rolls their signature chewy and soft structure. If you only have all-purpose flour, it will still work, but the texture might be slightly less springy. For the milk, whole milk will give you the richest flavor, but any milk will do. Finally, using instant yeast means you can mix it directly with your dry ingredients, making the process even simpler. If you only have active dry yeast, you may want to activate it in the warm milk for a few minutes before mixing.
Now, let’s get to the fun part—making the dough! Follow these simple steps for perfect rolls every time.
- Prepare your ingredients: Measure everything out and have it ready to go.
- Mix the dough: In the bowl of a stand mixer fitted with a dough hook (or a large bowl if kneading by hand), combine the bread flour, milk, sugar, salt, and instant yeast. Mix on low speed until the ingredients come together to form a shaggy dough. Add the 16g of softened butter and continue to knead for about 8-10 minutes on medium-low speed. The dough should become smooth, and elastic, and pull away from the sides of the bowl. You’re looking for it to form a “rough membrane,” meaning you can stretch a small piece relatively thin without it tearing immediately.

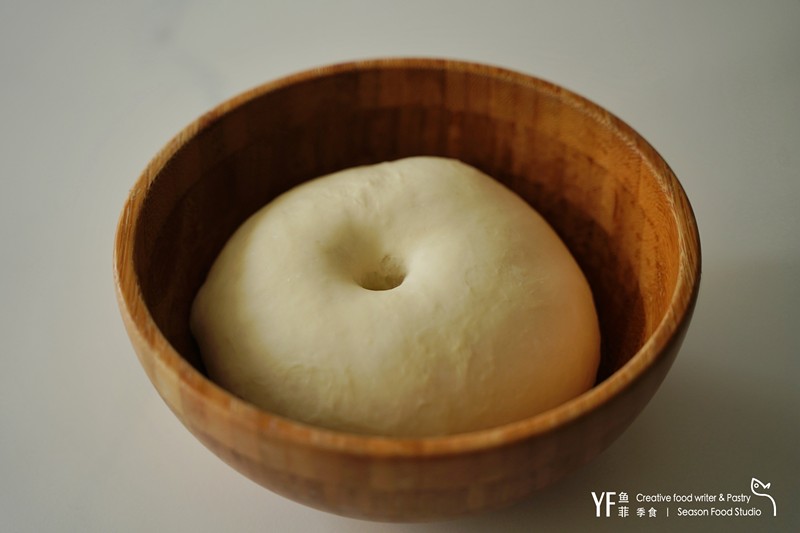
- First rise: Take the dough out and gently form it into a smooth ball. Place it in a lightly oiled bowl, cover it with a clean kitchen towel or plastic wrap, and let it rise in a warm, draft-free spot until it has doubled in size. This should take about 30-45 minutes.
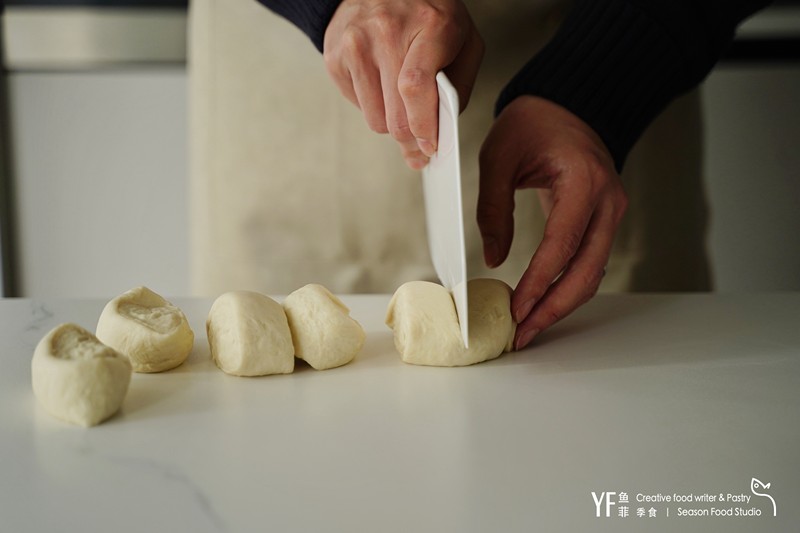
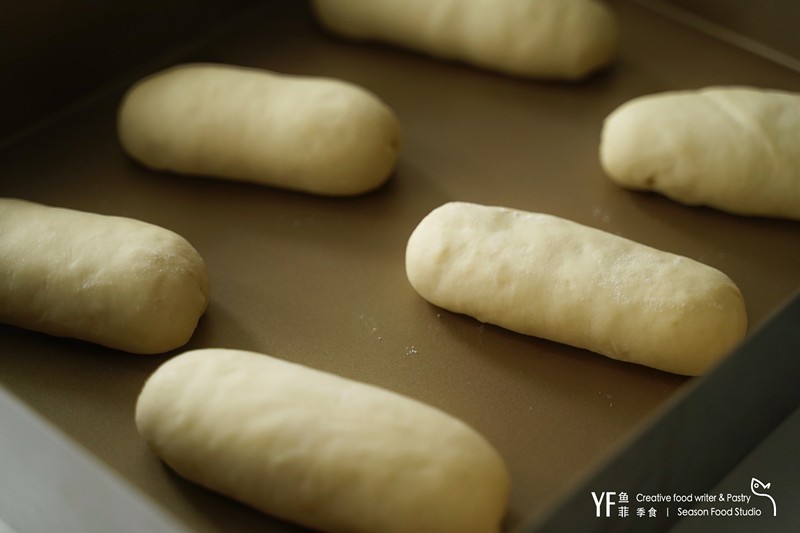
- Divide and conquer: Once doubled, gently press down on the dough to release the air. Transfer it to a clean work surface and divide it into six equal portions. A kitchen scale helps here for perfectly uniform rolls!
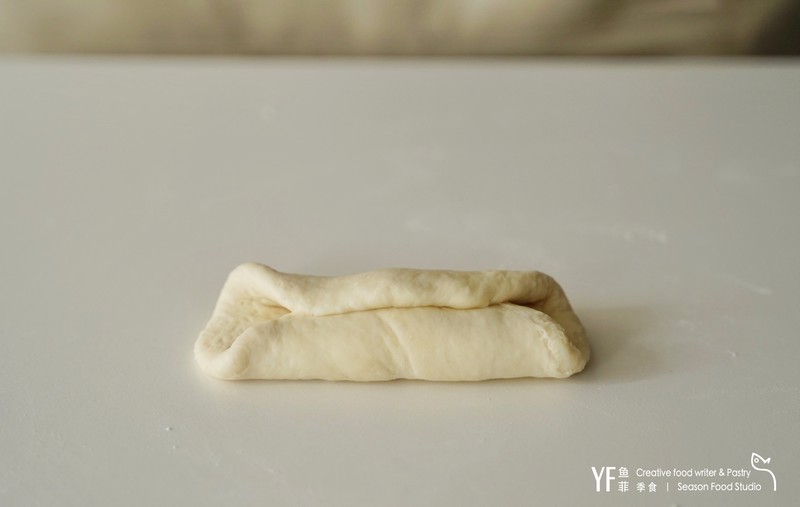
- Shape the rolls: Take one piece of dough and use a rolling pin to flatten it into an oval shape.

- The perfect fold: To create a wonderful texture, fold the top edge down to the middle, then fold the bottom edge up to meet it. Now, fold the left and right sides in towards the center. Gently pinch all the seams together at the bottom to create a neat little parcel. This shaping technique is the secret to a super-soft interior.
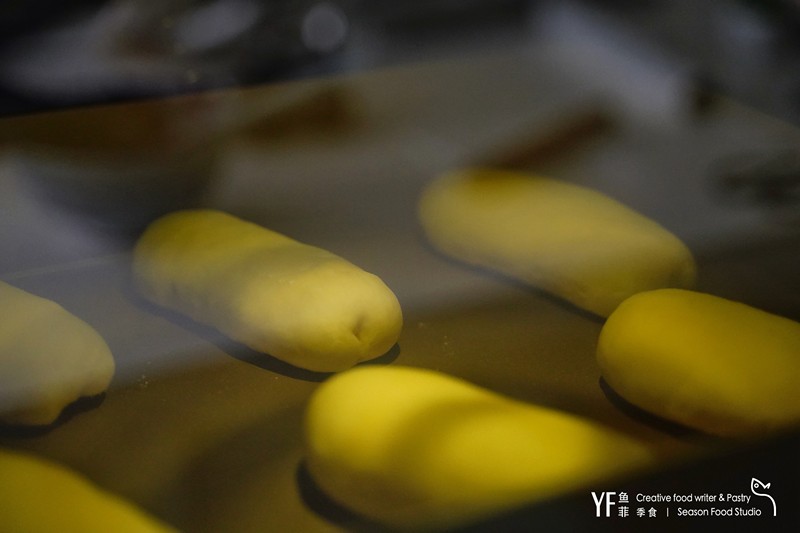
- Second rise: Place the shaped rolls, seam-side down, on a baking sheet lined with parchment paper. Cover them loosely and let them undergo a second rise for about 45 minutes in a warm place (around 35°C / 95°F is ideal). They will become visibly puffy.
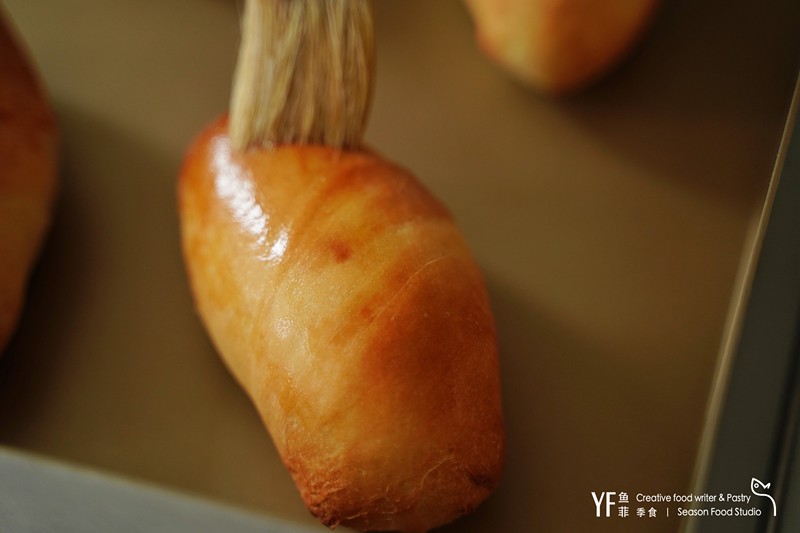
- Time to bake: Preheat your oven to 200°C (400°F). Bake the rolls for about 12 minutes, or until the tops are beautifully golden brown.
- The finishing touch: As soon as you remove the rolls from the oven, brush their tops with a little extra melted butter or a neutral oil. This gives them a lovely shine and ensures the crust stays soft and tender.
- Cool and serve: Let the rolls cool on a wire rack for a few minutes before serving. They are best enjoyed warm!
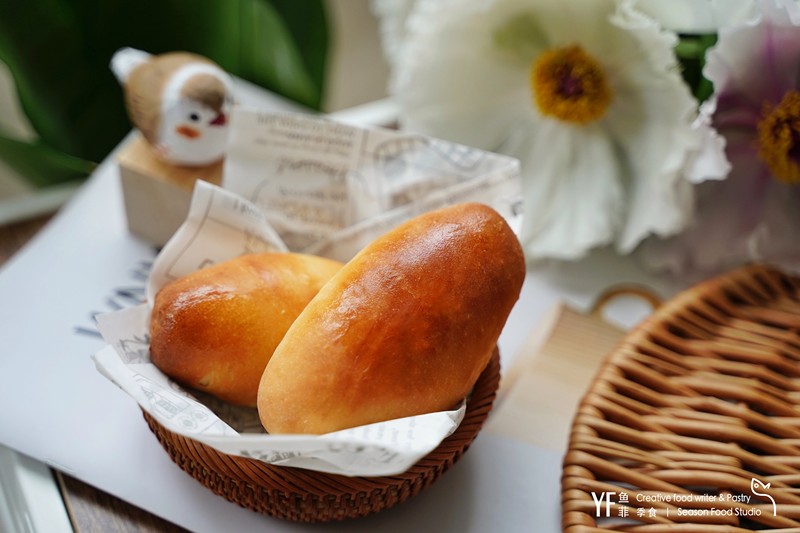
The experience of making these rolls is just as rewarding as eating them. Watching the simple dough transform into puffy, golden buns is pure kitchen magic. The first bite is heavenly—the crust is thin and soft, giving way to a light, airy, and slightly chewy interior that melts in your mouth. I made a batch last weekend, and they were the star of our family lunch, forming the perfect base for some pulled pork sliders. This recipe is a keeper, a go-to for a quick bread fix that never fails to please. I highly encourage you to try it. Whether you eat them plain, make them into hot dogs, or use them for sandwiches, you’ll be thrilled with the results. I’d love to hear how yours turn out, so feel free to share your experience in the comments below


